Monday, July 3, 2017

Why It Works

So, I have always been a skeptic of these "Get Rich Quick" or "Pyramid" schemes. I mean who isn't really. I have watched people, especially now-a-days all have their own little businesses on Facebook whether it be Lip Sense, Lularoe, Monat, Jamberry, etc. I see the everywhere, but to be honest, I don't really see how it is making changes in their lives. 

But I have an old friend who sells It Works. She posts so much not only about the products, but about how this company is changing her life. How she has paid for a wedding in Cancun IN CASH, paid off loans, is building a house etc. Every time I read her posts I am so happy for her and I also think, "I would like even just a tiny bit of that."

I read and I think about the Student Loans I got from college. Don't get me wrong, I am so glad I went but when those recruiters are coming in to your high school and telling you about college, they don't tell you about the debt you will get in. They don't tell you that if your parents are Middle Class, more than likely you will receive no help in scholarships or aide. I was a straight A student in HS, graduated 5th in my class...did that matter? No. Unless you are a purple martian, who plays the bagpipes, and cured some disease by the age of 6, you probably didn't get a ton of help either.

Fast forward a few years. I open some credit cards with the advice of my parents to help build my credit. Don't get me wrong they came in handy. But then again, no one told me they are had to maintain. You are Young and just think "woohoo, money," but then where does the money come from to pay for those? I still don't know either. Now I am glad I have had them because I have been in sticky situations that I have really needed them but dang you see that total of what you owe. Now, I am not at 10s of thousands of dollars so I may be being a little dramatic...

I go through funks as I am sure you all do about finances. Everyone tells you "Don't go out," "Put yourself on a budget," "You need to learn how to manage your money." Now, not saying these aren't slightly true, but I am not eating out that much. Maybe once, twice a month. I have no groceries in my house. I pretty much just buy gas, meals, and pay bills. While I appreciate people's "want" or "attempts" to help (notice those are in air quotes) but no one ever seems to give me a solid solution to maybe getting out of this hole.

Now I am not at all for one second saying that I am not proud of where I am... I mean, I am a single woman who owns my own house, pays my bills, I have a good job I have had for 8 years (well in August it will be 8), and I have family and friends who support me. But there are things I want to do. I want to go out to eat with friends without after wards wondering, "How am I going to pay for lunches for the next 5 days until I get paid." While I know everyone is just trying to help, they are also not in my shoes. Its hard to listen to someone who has a husband to help pay for all the bills, I don't.


So, I see my friends posts and I want to try. But even that $99 fee I think, I don't even have that right now.... So I just keep watching and reading the posts and hope that something will come along. And then....they had a promotion where you could sign up for just $10. WHAT?! $10?! I couldn't believe it. I even had to process it before I messaged her. I still was even skeptic. Is this a scam? Am I going to fail? Will I not make anything? I mean, I live in Oklahoma and let's be honest, Oklahoman's love their fried food (I am in that category as well before you jump on me). I am not in AZ or Cali where people are all about fit-fit-fit. But you know what? I knew I would kick myself if I didn't jump at the chance. So what if I fail? So what if no one buys from me? I mean yes, this will be TOTALLY AWESOME if this works the way I hope but what am I out, $10 and the fact that I least tried?

So here I am. An It Works newbie and completely terrified, but also excited. I don't know where this road will take me, but life is a journey...so let's go!

If you'd like to try out these products and become a Loyal Customer and receive my pricing head over to my It Works page. You just have to commit to either buy 1 product for 3 months or pay a one-time $50 fee. Think of it like a Sam's or Costco membership!!

Kitchen Facelift

So many of you probably don't know this, but I purchased my Grandmother's house in 2012 after she passed away. It was a great little home with some old charm.

It made me feel close to her still, but of course I couldn't live in ALL THAT WALLPAPER.... Right away we painted almost every wall....okay literally every wall was painted. I mean, it desperately needed a face lift. But the kitchen cabinets I left. As I live in it they began to fill more and more dated and the space felt like it was closing in on me.

I began sifting through Pinterest and Houzz trying to spark inspiration on what I wanted. I already had green walls so I decided white. And of course, I went with my all time love of my life... Annie Sloan Chalk Paint. But I didn't want just that. I wanted to change the look of them. They are made to look like paneling so they had these grooves in them that are completely spaced randomly (you know, to look like wood paneling).

I had this ingenious idea to cover them all in a bead board wallpaper and then put a trim around them. I went to Lowe's OF COURSE and began my search. I found this awesome bead board wallpaper (in case you weren't aware, you can no longer purchase wallpaper in store you have to order online) and purchased a heck of a lot of trim board.

So, I am sure you are like, quit jabbering and tell me how you did it already!!

Supplies:

  • Cabinet doors removed
  • New hinges (I had already replaced these)
  • Paint (since I used chalk paint, I didn't need to strip any finish off but depending the type of paint you use, you may want to see what is suggested for that) 
  • Clear wax - I prefer Minwax Matte Oil-Based Finishing Wax
  • Sanding paper (fine greet like 180 or higher)
  • Wood trim
  • Wallpaper (which I didn't end up using you will see below)
  • Nail gun (I had one already with a compressor)
  • New cabinet hardware if you are changing
  • Painters tape
  • Brown paper to help cover items in my cabinets
  • Brushes (I recommend natural bristles especially for chalk paint and wax)
  • Cotton rags for the wax
  • Circular saw
Step 1:
First step was to begin removing all kitchen cabinets and drawers. I recommend having some bags or boxes handy as you will need somewhere to put your items from the drawers. I left everything in my cabinets. Also, make sure you have a large work-space set up, I suggest in a garage. Also, remove all hinges and cabinet hardware.

Step 2:
Begin taping off everything. I chose not to paint inside my cabinets so I left everything in them and covered with brown craft paper. I taped off all edges around the inside and anywhere the cabinets met the painted walls. Don't forget to tape around built in appliances and sinks as well.

Step 3:
I cleaned off all my cabinets since after all, this is in a kitchen and there's this little thing called grease that likes to build up... I like Mean Green because it doesn't have harsh fumes and really cuts through the grease. I just used and old rag and this to wipe down all doors, drawers, and base cabinets. I even had to use a straight razor for a few areas that were thick. If you are using a paint that requires sanding or stripping, I recommend doing that step next.


Step 4:
So, if you are using the wallpaper this is where you add it. Once I realized I bought LEGIT wallpaper I decided to nix that idea. I thought I had purchased the stick on but this was the kind that you have to run through water and such and no one has time for that. It ended up working in my favor however. 
*Note: Pre-pasted does not mean stick on.*

Step 5:
I then added trim to my cabinet and drawer faces. Thanks to my Mom's meticulous measuring. 🤓 Make sure to measure twice, cut once. Cut the corners at 45° angles to the best looking finish. Although you are painting, you can still see how they are cut. You will then line up your pieces and nail them to your cabinet faces. Make sure you measure the depth for your nails. You don't want too long that you shoot the nail all the way through it or too short that they don't hold your trim to the cabinet. We used 1/4" x 1 3/4" for the doors and 1/4" x 1 1/8" for the drawers. Since the drawers are a smaller face, I used smaller for those as to not completely close in the drawer facing.


Step 6:
Paint time!!! This was my favorite part although long. I used Old White Annie Sloan Chalk Paint
I don''t purchase Annie Sloan brushes (as they are too expensive for me) but make sure you use natural bristle brushes. The idea with chalk paint is to paint in every direction for that old, textured look. This was a difficult  step for my mom as she likes to paint in long even strokes. There is a great video here on Annie Sloan's site to show you the technique I used. I also like to leave it open for a bit before I paint to let it thicken up. This also helps you get that texture. 

I painted about 3 coats on all doors, drawers, and base cabinets. Sometimes you can get away with just 2 coats. 
*Note: Chalk paint dries quickly and even faster in the heat so be aware. This can be a blessing and a curse.*
Before                |              After

Step 7:
Now it's time to wax!! I used just clear wax on this project but you could also add dark wax it that is the look you are going for. If you are using dark wax, I will add tips for that at the end of this step. Make sure you have your natural bristle brush and cotton rags. You can put most of the wax on with rags if you'd like, but you will need the brush for corners and small detail areas. I just put this on in a random pattern as to cover all the paint. You will be able to tell where you adding it as it will have a wet look.

Allow to dry until hard (usually 30 mins). Then, use a new rag (not the one you used to apply) to buff the wax. You will do this by rubbing in a circular motion. Dig down to your inner Mr. Miyagi. "Wax on, wax off." You will need to do this on all painted surfaces. This will create the barrier to protect your paint. I have read tutorials where people have also used polyurethane or other floor finishes. If you chose this route, please read their tips or tutorials on that as I didn't use this.

If you are using a dark wax.
  1. Apply a coat of clear wax first. Use my steps above on that.
  2. Apply your dark wax after the clear has completely dried. If you get it too dark, you can use the clear wax as an eraser.
  3. Apply another coat of clear wax once the dark wax dries and has the look you want.
*Note: If you apply the dark wax first, you will stain the paint and you CANNOT lighten it.*

Step 8:
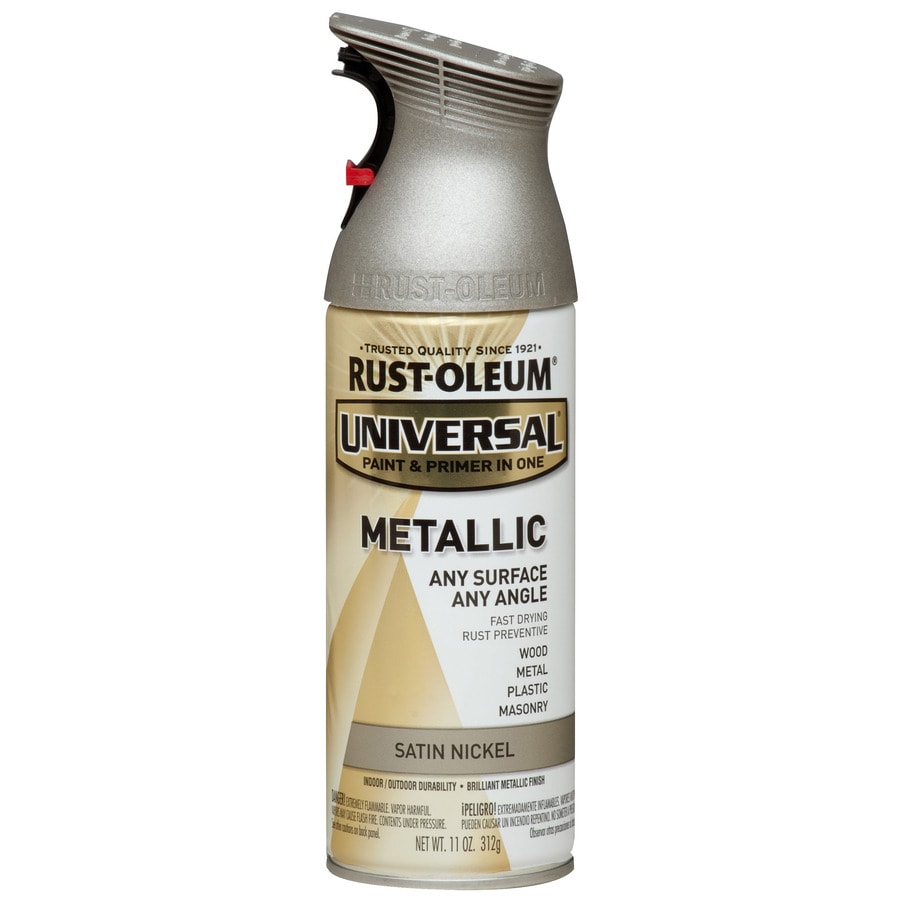
I had 2 doors that had a metal screen in them. These I taped off on the white painted part (once it was dry of course). I used Rust-Oleum's Satin Nickel Metallic Enamel spray paint. There are many other color options but I was using all satin nickel hardware. Also, a pop of color would be fun!!
Rust-Oleum Universal Nickel Metallic Enamel Spray Paint (Actual Net Contents: 11-oz)
I have also used Rub-n-Buff before but it is very tedious on a product like this with all the holes. I sprayed 2 coats on the metal. I needed 2 because the meal had the same stain/finish as the cabinets on the metal which made it very yellow to begin with. Once that dried, I could remove the tape.
Before         |                     After         

Step 9:
Once everything has dried, go through and remove all your painters tape and paper. It looks so different doesn't it?
Nala thinks she's helping.

Step 10:
Add back your original or new hardware. This includes your hinges and cabinet hardware. I wanted pulls on everything so I had to drill 1. new holes anyways through the new trim and 2. a 2nd hole on the doors since they originally had knobs. I used an extra piece of trim to make template so that each door looked the same and used the original hole as  guide. Once I had all those holes drilled I could add all my cabinet hardware. I actually took all this hardware from my Nana's house after she passed away.

Step 11:
Re-hang all your doors and put back all your drawers. Don't forget to put all your stuff back in your drawers!!!

Step 12:
I also went through and painted all the trim and paneling in my kitchen as well. Use the same steps as above for your paint and wax as I already laid out.

Step 13:
Enjoy your finished project!!! I am sure it turned out fabulous. 
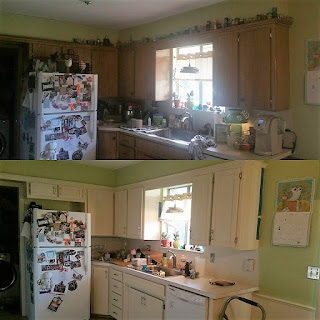
Before (Top)          |          After (Bottom) 
Sorry still messy in these pics.

Before (Top)          |          After (Bottom) 
Sorry still messy in these pics.


Post your before and after pictures in the comments below!!!

Sunday, July 2, 2017

DIY : Vintage Fan Desk Lamp


Hey guys! To say that I am excited about this project would be an understatement. My LOVE for DIY, vintage finds, and repurposing made this a complete joy for me! This was a Christmas present for my brother and his girlfriend this past Christmas.

Once I decided what I wanted to do for them, the search began for the perfect fan. I knew it wouldn't be easy but I didn't have to look far. Luckily, there are no shortages of antique and junk stores in my area. I found the perfect fan at one of my favorite places in town the Rink Gallery. I will say, I am typically rather partial to this place. It has the right amounts of antiques and junk (junk being my absolute favorite).

So, as I was about to give up on even finding a fan after going to multiple places with no luck at all, and I was almost all the way through the place, there one was. Just sitting there like it was waiting for me to find it. 

I will admit, it took me a minute to decide on it. I mean, it was $75 and it seemed high for something I was about to completely gut. There I stood, in the middle of the store, they were about to close in 15 minutes and I am searching on Etsy and Google for other fans and their pricing. Once I found that the majority of the fans started around $60 for fans half the size of this one (and my parents telling me to quit over thinking things) I bought it. 
And home we went. 

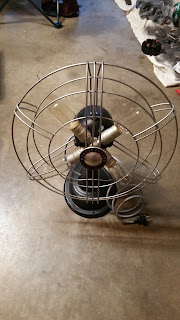
Once home and ready to work, it was time to take this puppy apart. This I will tell you is an intense process. One suggestion I have, I did this over a couple week time span, (not that it took me that long, I just did little bits here and there), so as you take your fan apart, find a system to keep track of what parts go where. The majority of the guts will become trash. I however, DIDN'T, so it was a lot of fun at the end putting it back together and seeing what fit where. I felt like a toddler learning that the round peg doesn't fit in the square hole.
(I know you are jealous of this awesome tie-dyed blanket I have here. I used it to keep my carpet clean since I was working on in my den and this has basically become a dog blanket 🐶)

Look at that gross old plug I took out.

Once I had it all take apart, I cleaned out a lot of the old grease. Not that this was needed for function, I just thought it gross to leave it all in there. And there was a TON. Then I decided what colors I wanted to paint it. I wanted to keep the vibe of it but have it look newer/more modern. You can also leave it in its original state I just new that wouldn't fit in my brother's aesthetics (mine it would). So I decided on a chalkboard and satin nickel spray paint both from Rustoleum.
I made sure to take the manufacturer logo off the grill and tape off the original labels on the fan body to still keep the integrity of the fan. I then painted all the pieces.
(Before I painted. 
I didn't actually need to paint the bottom since I recovered that in felt but oh well)

The painting process was interesting considering my brother was now home at this point and insisted on going out in my garage so I had to keep covering with a dog crate lid and a sheet. I recommend if this is a gift, do it when they aren't staying at your house or make sure they don't enter into your space. I had to do a few touch-ups because of this but no biggie.

Now, it was wiring everything up.
Things I used on mine:
  • Brass keyless sockets from Lowe's 
  • 18/2 clear lamp cord  from Lowe's (about 5')
  • 8-pk brass lamp pipes from Lowe's 1/8 (I only used the small ones so I bought 2 pks)
  • Rotary switch from Lowe's
  • 4-lite cluster body from Liberty Brass (make sure you watch the pipe sizing, I used 1/8 which is pretty standard). 
  • Vintage bulbs I bought from my store Lifestyle's Stores
  • Black and white zig-zag round wire from Vintage Wire Supply (I ordered 5' but they are completely awesome and sent me an extra foot)
  • Antique replica black plug from Vintage Wire Supply
  • Long 1/8 all thread approximately 8" 
  • Wire strippers
  • Electrical tape
  • Wire nuts
  • Screwdriver
  • Razor blade
**WARNING-IF YOU ARE NOT COMFORTABLE WITH WIRING GET SOMEONE WHO IS. I AM NOT AN ELECTRICIAN AN AM NOT RESPONSIBLE IF ANY WIRING IS DONE WRONG*

I began by wiring the sockets one-by-one. Make sure, if you are not familiar with wiring you look up the correct way. I typically use this image. It helps you find the correct wires and screws. (This is also helpful when you get to the plug.) There are also a lot of great videos on YouTube you can watch.
Once I had all the sockets wired, we had to attach them to the cluster body. This was tough since it gets very tight with all the wiring. I actually had to redo it since the first time I did the wires shorted. I knew this because when we plugged it in it POPPED and smoke came out the back. DO NOT touch the lamp when you are testing and plugging it in for this reason. If I had been touching the lamp when I plugged it in I could've been seriously injured.

Once we had all the wiring good and safely wrapped in electrical tape I attached cluster body and sockets to the body of the motor with the long all thread. This is a trial by error process finding the correct length and positioning. You don't want it too far into the cluster body that it pinches or cuts into the wires. I painted the all thread since you would see it through the body and I didn't want it to be noticeable.

Once that was in place, I wired the sockets onto the decorative round wire. I only used this where it would be seen (along the side of the body and for the actual plug). Once again, make sure you use your wire nuts and electrical tape properly and make sure that the wires are not touching one another (hot and neutral). 

I then added the plug to the end. This was also fun since it was my first time using a separate plug I had to wire on. The plug I used also had the same size prongs so there wasn't a "hot and neutral" side which took me lots of searching online.

I also added a rotary switch which I enlisted the help of my Uncle to wire that since he is an electrician and I kept blowing the breaker so I insist on enlisting help here or finding a good how-to online.

When all the wiring was said and done, all I had left to do was reassemble it. I recovered the base with all new felt which I already had but you can find this at any craft store. This took two people to do FYI. 

And voila...all done!!!


WHAT'S BEEN UP...

So I realize I have taken a bit of a hiatus from this blog...

I'd like to get back on here and sorry I haven' been. There has been so much going on that it's just been a whirlwind!!Work is getting crazy, Relay season has finished, starting a new venture with It Works, my brother is getting married and buying a house; there's almost so much I am not sure where to start again.

So I am just going to leave this little bit here and I will pick up...