So I needed a creative little gift to give one of my best friends growing up for her wedding. Yes I will also get the traditional pots or pans but I am a crafty person and jsut crave making something special for people.
So, I decided on a card holder for her to put all of her wedding cards in.
You will need:
Cardboard or Model board
At least 3 different kinds of paper
Glue
Ruler or Measuring board (you can see in my photos)
Scissors or an X-Acto knife
Ribbon or Lace
2 Brads
Metal Ring that opens
Any kind of details you want to add
*I found all these at Hobby Lobby
but you can go to any kind of craft & hobby store
Typically, if you are making this for yourself, then use your cards to measure out how big to make it, since I am making it for someone, I tried to find one of the largest cards I had and used that. You will want to make it about a 1/4" bigger on each side.
Once you have it measured, you will need to cut it out. You can use cardboard or I used thicker board typically used for building models. Its much sturdier but a lot harder to cut.
You will need at least 3 kinds of paper (more if you'd like), I used scrapbooking paper since its a sturdier paper in the colors of her wedding.
Measure out how big you want each piece and then you can glue on. I used just a traditional glue stick, it holds well and you can get the paper covered well. I used a solid purple on the top and a patterned ivory on the bottom for the front and ivory on the top on back. I used a textured ivory for the insides but don't glue the inside back on yet.
The reason you held off on the inside back paper is to put on a ribbon with brads. I used a lace but you can use any ribbon you please.
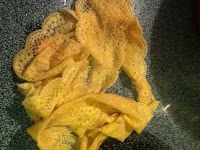
Now, with her colors being ivory and the lace I bought was white, I decided to tea stain it. This is a very simple process. Just boil some water. Once it's boiling, use a tea bag to steap the tea. Then just add the lace and stir around. The longer you leave it, the darker it will get.
The finished product.
You will then use brads to hold the ribbon in place on the back side of the back piece. Once you have done this, you can then glue the inside back paper down.
Now you can add whatever details you please. I did an "R" from a chip board letter and scrapbook paper for their last name, a sticky decal from the scrapbooking section, metal numbers for theiir wedding date, and a tag with "wedding cards". Feel free to put whatever your heart desires.
When you are finished, you will need to add a metal ring in the top left corner so that cards can be added in (sorry I didn't get a photo)
And enjoy!


No comments:
Post a Comment