Showing posts with label DIY. Show all posts

Monday, July 3, 2017

Kitchen Facelift

So many of you probably don't know this, but I purchased my Grandmother's house in 2012 after she passed away. It was a great little home with some old charm.

It made me feel close to her still, but of course I couldn't live in ALL THAT WALLPAPER.... Right away we painted almost every wall....okay literally every wall was painted. I mean, it desperately needed a face lift. But the kitchen cabinets I left. As I live in it they began to fill more and more dated and the space felt like it was closing in on me.

I began sifting through Pinterest and Houzz trying to spark inspiration on what I wanted. I already had green walls so I decided white. And of course, I went with my all time love of my life... Annie Sloan Chalk Paint. But I didn't want just that. I wanted to change the look of them. They are made to look like paneling so they had these grooves in them that are completely spaced randomly (you know, to look like wood paneling).

I had this ingenious idea to cover them all in a bead board wallpaper and then put a trim around them. I went to Lowe's OF COURSE and began my search. I found this awesome bead board wallpaper (in case you weren't aware, you can no longer purchase wallpaper in store you have to order online) and purchased a heck of a lot of trim board.

So, I am sure you are like, quit jabbering and tell me how you did it already!!

Supplies:

  • Cabinet doors removed
  • New hinges (I had already replaced these)
  • Paint (since I used chalk paint, I didn't need to strip any finish off but depending the type of paint you use, you may want to see what is suggested for that) 
  • Clear wax - I prefer Minwax Matte Oil-Based Finishing Wax
  • Sanding paper (fine greet like 180 or higher)
  • Wood trim
  • Wallpaper (which I didn't end up using you will see below)
  • Nail gun (I had one already with a compressor)
  • New cabinet hardware if you are changing
  • Painters tape
  • Brown paper to help cover items in my cabinets
  • Brushes (I recommend natural bristles especially for chalk paint and wax)
  • Cotton rags for the wax
  • Circular saw
Step 1:
First step was to begin removing all kitchen cabinets and drawers. I recommend having some bags or boxes handy as you will need somewhere to put your items from the drawers. I left everything in my cabinets. Also, make sure you have a large work-space set up, I suggest in a garage. Also, remove all hinges and cabinet hardware.

Step 2:
Begin taping off everything. I chose not to paint inside my cabinets so I left everything in them and covered with brown craft paper. I taped off all edges around the inside and anywhere the cabinets met the painted walls. Don't forget to tape around built in appliances and sinks as well.

Step 3:
I cleaned off all my cabinets since after all, this is in a kitchen and there's this little thing called grease that likes to build up... I like Mean Green because it doesn't have harsh fumes and really cuts through the grease. I just used and old rag and this to wipe down all doors, drawers, and base cabinets. I even had to use a straight razor for a few areas that were thick. If you are using a paint that requires sanding or stripping, I recommend doing that step next.


Step 4:
So, if you are using the wallpaper this is where you add it. Once I realized I bought LEGIT wallpaper I decided to nix that idea. I thought I had purchased the stick on but this was the kind that you have to run through water and such and no one has time for that. It ended up working in my favor however. 
*Note: Pre-pasted does not mean stick on.*

Step 5:
I then added trim to my cabinet and drawer faces. Thanks to my Mom's meticulous measuring. ðŸ¤“ Make sure to measure twice, cut once. Cut the corners at 45° angles to the best looking finish. Although you are painting, you can still see how they are cut. You will then line up your pieces and nail them to your cabinet faces. Make sure you measure the depth for your nails. You don't want too long that you shoot the nail all the way through it or too short that they don't hold your trim to the cabinet. We used 1/4" x 1 3/4" for the doors and 1/4" x 1 1/8" for the drawers. Since the drawers are a smaller face, I used smaller for those as to not completely close in the drawer facing.


Step 6:
Paint time!!! This was my favorite part although long. I used Old White Annie Sloan Chalk Paint
I don''t purchase Annie Sloan brushes (as they are too expensive for me) but make sure you use natural bristle brushes. The idea with chalk paint is to paint in every direction for that old, textured look. This was a difficult  step for my mom as she likes to paint in long even strokes. There is a great video here on Annie Sloan's site to show you the technique I used. I also like to leave it open for a bit before I paint to let it thicken up. This also helps you get that texture. 

I painted about 3 coats on all doors, drawers, and base cabinets. Sometimes you can get away with just 2 coats. 
*Note: Chalk paint dries quickly and even faster in the heat so be aware. This can be a blessing and a curse.*
Before                |              After

Step 7:
Now it's time to wax!! I used just clear wax on this project but you could also add dark wax it that is the look you are going for. If you are using dark wax, I will add tips for that at the end of this step. Make sure you have your natural bristle brush and cotton rags. You can put most of the wax on with rags if you'd like, but you will need the brush for corners and small detail areas. I just put this on in a random pattern as to cover all the paint. You will be able to tell where you adding it as it will have a wet look.

Allow to dry until hard (usually 30 mins). Then, use a new rag (not the one you used to apply) to buff the wax. You will do this by rubbing in a circular motion. Dig down to your inner Mr. Miyagi. "Wax on, wax off." You will need to do this on all painted surfaces. This will create the barrier to protect your paint. I have read tutorials where people have also used polyurethane or other floor finishes. If you chose this route, please read their tips or tutorials on that as I didn't use this.

If you are using a dark wax.
  1. Apply a coat of clear wax first. Use my steps above on that.
  2. Apply your dark wax after the clear has completely dried. If you get it too dark, you can use the clear wax as an eraser.
  3. Apply another coat of clear wax once the dark wax dries and has the look you want.
*Note: If you apply the dark wax first, you will stain the paint and you CANNOT lighten it.*

Step 8:
I had 2 doors that had a metal screen in them. These I taped off on the white painted part (once it was dry of course). I used Rust-Oleum's Satin Nickel Metallic Enamel spray paint. There are many other color options but I was using all satin nickel hardware. Also, a pop of color would be fun!!
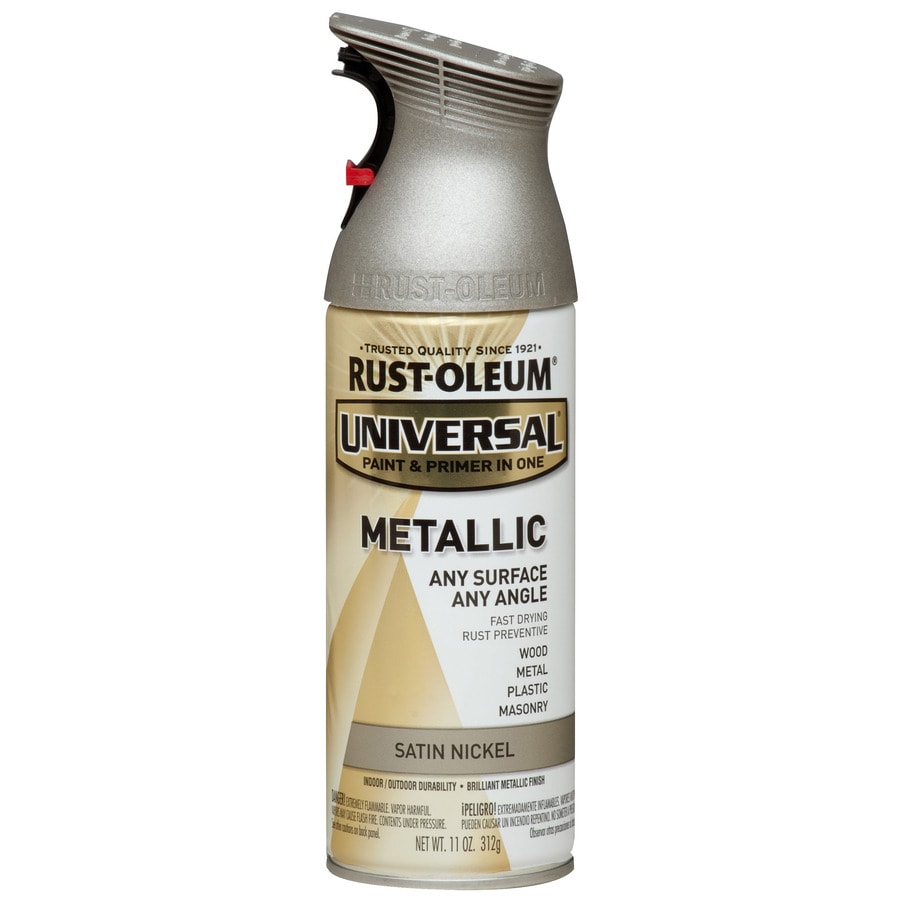
Rust-Oleum Universal Nickel Metallic Enamel Spray Paint (Actual Net Contents: 11-oz)
I have also used Rub-n-Buff before but it is very tedious on a product like this with all the holes. I sprayed 2 coats on the metal. I needed 2 because the meal had the same stain/finish as the cabinets on the metal which made it very yellow to begin with. Once that dried, I could remove the tape.
Before         |                     After         

Step 9:
Once everything has dried, go through and remove all your painters tape and paper. It looks so different doesn't it?
Nala thinks she's helping.

Step 10:
Add back your original or new hardware. This includes your hinges and cabinet hardware. I wanted pulls on everything so I had to drill 1. new holes anyways through the new trim and 2. a 2nd hole on the doors since they originally had knobs. I used an extra piece of trim to make template so that each door looked the same and used the original hole as  guide. Once I had all those holes drilled I could add all my cabinet hardware. I actually took all this hardware from my Nana's house after she passed away.

Step 11:
Re-hang all your doors and put back all your drawers. Don't forget to put all your stuff back in your drawers!!!

Step 12:
I also went through and painted all the trim and paneling in my kitchen as well. Use the same steps as above for your paint and wax as I already laid out.

Step 13:
Enjoy your finished project!!! I am sure it turned out fabulous. 
Before (Top)          |          After (Bottom) 
Sorry still messy in these pics.

Before (Top)          |          After (Bottom) 
Sorry still messy in these pics.


Post your before and after pictures in the comments below!!!

Saturday, August 16, 2014

Piano face lift : Part I

My Grandmother left my cousin Rachel her old piano after she passed. This piece has definitely seen a lot in its days. Children growing up right around it; then grandchildren. It has scars, stories, and a life of its own that it has lived. I was enlisted in giving this piece a face lift since it has seen its better days as far as the looks department goes. I was chosen since as they say, I'm the "crafty" one in the family and seem to get the most joy out of these sorts of projects.
So, I have decided to share my process and journey with you as I go along. This will be a project that will last me awhile indeed. Hopefully I can truly bring a new life to this for my cousin.
To begin, you will need to gather your supplies. I purchased all of these at Lowes or you can use your local hardware store you like best.
  • Stripper.
    • I like Citristrip since it's not as harsh and low VOCs which means less fumes.
  • Mineral Spirits.
  • Chemical resistant gloves.
  • Flat scraper.
  • Stripping pads.
  • Drop Cloth if you don't want a mess all over your floor.
    • Trust me, there will be a huge mess.
  • Eye wear.
    • You could possibly splash or fling the products or the stain/paint your stripping into your eye.
  • Natural bristle brush.
  • Metal pan to pour your stripper into, or whatever your instructions tell you to use.
  • Mask if using a stripping agent with high VOCs.

Tuesday, October 2, 2012

Corkboard Facelift

I decided to give an old corkboard I had laying around a little makeover.

I had all the items I needed laying around but if you have to go out and buy this project will probably cost you $30-$40 depending on the board and stencil you buy.
This started as a simple corkboard you can buy at Walmart or Target (or just about anywhere).
I think this one was a RoseArt. See....pretty plain jane.

Now, you will need to pick a design. Just go buy a stencil for whatever design you want.

Fun Take on a Picture Frame

I actually did these frames as a birthday present for a friend. You could get creative on what you use for the frame...a block of wood, old cabinet door, etc. I actually have a lot of old wood samples from a furniture company from my work that I used.

What you'll need:
Whatever you are going to use for the main part of the frame
(Cabinet door, block of wood, be creative)
Picture
Accessories to add on
(Metal pieces, appliques, etc.)
Glue

So on these wood samples, one had a lot of texture and the other a lot of wax which makes it kind of hard to glue anything on. I had to use a paint stripper to remove the finish from the raised panel in the center.
(If you are going to do this step have a clean surface that nothing can possibly be ruined if it drips our spills.)
Wear thick rubber gloves, if the stripper gets on your skin it will burn extremely bad. Pour the stripper into something you don't care about: an old bowl our cup. I  used an old coffee pot I bought at the thrift store for a dollar for this very purpose. Use a paint brush and brush on the stripper. Let sit for about 30 mins. Use a paint scraper to scrape off the paint or finish. It may take a few applications to remove everything. Feel free to leave some for a rustic, antique look. When done clean with a damp cloth and let dry completely. I would use an old rag just in case it ruins it.
(Sorry I didn't get a picture of this)

Tuesday, September 4, 2012

DIY T-Shirt Scarves

So...if you are anything like me, you are always looking for new and cute scarves.
Well, if you really are anything like me, you hate paying for them. I am on a bit of a stricter budget,
so any money I can save is great.

I have several bags of old clothes that I keep meaning
to donate but as of right now,
they are dust collectors in my closet.
So, I went rummaging through them to find ones that I liked the fabrics of.

You are going to need:
Old T-Shirt
(The wider it is the longer your strands will be...The longer it is the more strands you will have)
Scissors

First thing you will need to do is lay your shirt out flat.

Sunday, August 26, 2012

Hand Painted Shoes

So I had seen an adorable pair of hand painted Toms on Pinterest. Of course I had to make these but I didn't care to pay $50/pair just to draw all over them. I found these on The Breast Cancer Site for $20/pair. Each pair I bought had a pair donated through Soles4Souls and I helped fund mammograms for women with Breast Cancer. So it was truly a win win.

What you'll need:

A pair of canvas shoes
(I got just plain white so they were easy to color on top of)

Fabric markers...I used the Tulip brand found at Walmart
(You can use fabric paint as well but that'll be much more tedious and time consuming. The fabric markers are permant, washable and easy to use.)

Imagination!!!

Thursday, August 2, 2012

DIY Shrug

This is a fun way to revamp an old shirt that was destined for the trash or Goodwill and recreate it into something new and fun. The purple shirt was a gift from a friend that never quite fit right. I loved the color and the beading and really didn't want to give it away so this was a perfect solution. My other shirt was an inexpensive shirt from Walmart that always looked a little frumpy on.

I originally found this on Wobiso's blog.

What you are going to need is:
An old shirt  (Make sure that it fits you before you start. If it is pretty small, it will be too small when you are done.)
Scissors
Ribbon  (Or whatever you want to use for the tie. You can even use the bottom of another shirt.)
Sewing Machine
Sewing Pins
Safety Pin  (This will be used to pull the ribbon through.)

Monday, April 16, 2012

Flippy Floppies

I have been making these flip flops for years, since I played soccer. They are great for teams, fundraisers, gifts, or just for yourself.

You will need a set of flip flops. You can do a plain or patterned like I did.
The thinner the band across the foot the easier this will be. These particualr ones were a little thick.

Then you will need some fabrics. You can mix solids, use one pattern, or several like I did for this post.
I got these, 5 pieces of 18" x 21" pieces from Hobby Lobby for $9.99. Pretty much anywhere that sells fabrics will sell scrap pieces which are great for this, but don't feel bad to go pick some fabrics from a bolt.

A pretty place for the birds

I found this little birdhouse at the thrift store right by my house for a $1.98. I have been wanting to get one and always love a fixer-upper chalenge.

I took out the fake bird that was glued in the hole.

I then painted the house using acryllic paints (I love the Folk Art brand the best). I did the body turquoise and the roof red. it took several coats to cover since the original was pretty slick and I couldn't find my sand paper to rough it up.

After I painted it, I sealed it with Krylon's spray clear coat. Since its going to go outside, I wanted the paint to be protected from the elements.

Then, I just added some little details from Hobby Lobby. I drilled a hole in front for a knob (added a little glue to help secure it). Then I glued on a rusty metal cross on back and butterfly on the top.

It turned out so cute. I love and and so do the birds.

Wedding Card Keeper

So I needed a creative little gift to give one of my best friends growing up for  her wedding. Yes I will also get the traditional pots or pans but I am a crafty person and jsut crave making something special for people.

So, I decided on a card holder for her to put all of her wedding cards in.

You will need:
Cardboard or Model board
At least 3 different kinds of paper
Glue
Ruler or Measuring board (you can see in my photos)
Scissors or an X-Acto knife
Ribbon or Lace
2 Brads
Metal Ring that opens
Any kind of details you want to add
*I found all these at Hobby Lobby 
but you can go to any kind of craft & hobby store


 Typically, if you are making this for yourself, then use your cards to measure out how big to make it, since I am making it for someone, I tried to find one of the largest cards I had and used that. You will want to make it about a 1/4" bigger on each side.

From a Sewing Cabinet to Desk

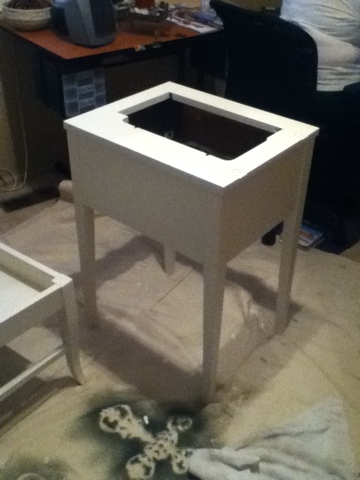
So for Christmas, I decided to make my younger cousin Josie a little desk. She fell in love with one at my work but I was not about to spend $400 on a desk. So I went on the hunt for a small desk and chair, scouring thrift stores and little antique shops. I came across an old sewing cabinet and an old piano chair (one where the seat lifts up for storage) at this great little place in OKC The Feathered Nest. The desk cost me $30 and the chair $24.

I went to Walmart to get some Glidden paint. I bought 2 pints in a soft ivory satin. These cost a total of about $26. Feel free to choose any color. I chose a white to match the furniture in her room. I also wanted it to be a piece she could grow in to.

You'll first want to wipe down the furniture if its a little old and then lightly sand it. It took me about 2 coats to cover it well. Also, if it is in parts like mine was, I suggest taking everything apart and all the hardware off.

To go below the opening in the desk where the sewing machine would typically go (I wanted her to be able to lift the top and have a little built in drawer that she could store her supplies) I bought a simple tray for about $25 and some modge podge for $5 at Hobby Lobby. (Just so you know, most the time they have half the store 1/2 off or you can get a 40% one item coupon on their website every other week.) I then bought some fabric and lining at Interior Fabrics for about $16 total for a yard of each.

I folded it to fit the inside of the tray bottom and used a little spray glue (I recommend using another type of glue if you plan to do this for a tray that you can see every detail because its very messy and stuck to the sides.) I then used a modge podge to make a clear sealant. When doing this over fabric it may take 2 or more coats to get a smooth finish. It took 3 for this tray. (I love it so much I want to make one for my living room.)

A Diaper Cake That Looks So Good You'll Wish It Was Real


So for my friends baby shower I took my first attempt at creating a diaper cake out of the gifts I bought. In my cake I have:

Diapers (I bought a 76 pack, you'll want a larger quantity if you want to make a larger cake)
4 pack of receiving blankets
A small stuffed plush
2 pack of caps
5 pack of onsies
2 pack of pacifiers
Rubber bands
Foam core board
For the "candles":
Paper
Scrap booking letters
Toothpicks

The first step is to roll your diapers and wrap a rubber band around them. After a few tries, I found it was easier to roll about five (1 for the center and 4 on either side) then wrap a rubber ban around. I had about 8 on the top tier, about 24 on the middle, and about 45 on the bottom. I put 2 rubber bands around each tier and spaced them out so they looked more even. Otherwise, it was really tight in the center and flared out on the top and bottom.

Saturday, December 3, 2011

An Ornamental Christmas...Tree That Is

So I decided to make a Christmas tree inspired by the Home Depot commercial. It is fairly simple just a little time consuming. I spaced it out and didn't do it all at once.

You will need:
Clear tacks if you're hanging it from the ceiling, (you'll need metal hooks if hanging it from a chandelier like in the commercial )
Ornaments ( you can use one color or several. I used 3 colors and all different patterns )
Clear Fishing line
Hammer
Tape measure or yard stick
Scissors

If you are using different colors or designs I suggest laying them out before hand to get the right pattern you want. They will be easy to move, but I'm sure you won't want to very many times. Once you have your pattern you'll want to look at the space you are going to put these in and plan out how long you want each row and how far apart. Mine are 4" longer for each row and about an 1 1/2" wider for each.