Monday, July 3, 2017

Why It Works

So, I have always been a skeptic of these "Get Rich Quick" or "Pyramid" schemes. I mean who isn't really. I have watched people, especially now-a-days all have their own little businesses on Facebook whether it be Lip Sense, Lularoe, Monat, Jamberry, etc. I see the everywhere, but to be honest, I don't really see how it is making changes in their lives. 

But I have an old friend who sells It Works. She posts so much not only about the products, but about how this company is changing her life. How she has paid for a wedding in Cancun IN CASH, paid off loans, is building a house etc. Every time I read her posts I am so happy for her and I also think, "I would like even just a tiny bit of that."

I read and I think about the Student Loans I got from college. Don't get me wrong, I am so glad I went but when those recruiters are coming in to your high school and telling you about college, they don't tell you about the debt you will get in. They don't tell you that if your parents are Middle Class, more than likely you will receive no help in scholarships or aide. I was a straight A student in HS, graduated 5th in my class...did that matter? No. Unless you are a purple martian, who plays the bagpipes, and cured some disease by the age of 6, you probably didn't get a ton of help either.

Fast forward a few years. I open some credit cards with the advice of my parents to help build my credit. Don't get me wrong they came in handy. But then again, no one told me they are had to maintain. You are Young and just think "woohoo, money," but then where does the money come from to pay for those? I still don't know either. Now I am glad I have had them because I have been in sticky situations that I have really needed them but dang you see that total of what you owe. Now, I am not at 10s of thousands of dollars so I may be being a little dramatic...

I go through funks as I am sure you all do about finances. Everyone tells you "Don't go out," "Put yourself on a budget," "You need to learn how to manage your money." Now, not saying these aren't slightly true, but I am not eating out that much. Maybe once, twice a month. I have no groceries in my house. I pretty much just buy gas, meals, and pay bills. While I appreciate people's "want" or "attempts" to help (notice those are in air quotes) but no one ever seems to give me a solid solution to maybe getting out of this hole.

Now I am not at all for one second saying that I am not proud of where I am... I mean, I am a single woman who owns my own house, pays my bills, I have a good job I have had for 8 years (well in August it will be 8), and I have family and friends who support me. But there are things I want to do. I want to go out to eat with friends without after wards wondering, "How am I going to pay for lunches for the next 5 days until I get paid." While I know everyone is just trying to help, they are also not in my shoes. Its hard to listen to someone who has a husband to help pay for all the bills, I don't.


So, I see my friends posts and I want to try. But even that $99 fee I think, I don't even have that right now.... So I just keep watching and reading the posts and hope that something will come along. And then....they had a promotion where you could sign up for just $10. WHAT?! $10?! I couldn't believe it. I even had to process it before I messaged her. I still was even skeptic. Is this a scam? Am I going to fail? Will I not make anything? I mean, I live in Oklahoma and let's be honest, Oklahoman's love their fried food (I am in that category as well before you jump on me). I am not in AZ or Cali where people are all about fit-fit-fit. But you know what? I knew I would kick myself if I didn't jump at the chance. So what if I fail? So what if no one buys from me? I mean yes, this will be TOTALLY AWESOME if this works the way I hope but what am I out, $10 and the fact that I least tried?

So here I am. An It Works newbie and completely terrified, but also excited. I don't know where this road will take me, but life is a journey...so let's go!

If you'd like to try out these products and become a Loyal Customer and receive my pricing head over to my It Works page. You just have to commit to either buy 1 product for 3 months or pay a one-time $50 fee. Think of it like a Sam's or Costco membership!!

Kitchen Facelift

So many of you probably don't know this, but I purchased my Grandmother's house in 2012 after she passed away. It was a great little home with some old charm.

It made me feel close to her still, but of course I couldn't live in ALL THAT WALLPAPER.... Right away we painted almost every wall....okay literally every wall was painted. I mean, it desperately needed a face lift. But the kitchen cabinets I left. As I live in it they began to fill more and more dated and the space felt like it was closing in on me.

I began sifting through Pinterest and Houzz trying to spark inspiration on what I wanted. I already had green walls so I decided white. And of course, I went with my all time love of my life... Annie Sloan Chalk Paint. But I didn't want just that. I wanted to change the look of them. They are made to look like paneling so they had these grooves in them that are completely spaced randomly (you know, to look like wood paneling).

I had this ingenious idea to cover them all in a bead board wallpaper and then put a trim around them. I went to Lowe's OF COURSE and began my search. I found this awesome bead board wallpaper (in case you weren't aware, you can no longer purchase wallpaper in store you have to order online) and purchased a heck of a lot of trim board.

So, I am sure you are like, quit jabbering and tell me how you did it already!!

Supplies:

  • Cabinet doors removed
  • New hinges (I had already replaced these)
  • Paint (since I used chalk paint, I didn't need to strip any finish off but depending the type of paint you use, you may want to see what is suggested for that) 
  • Clear wax - I prefer Minwax Matte Oil-Based Finishing Wax
  • Sanding paper (fine greet like 180 or higher)
  • Wood trim
  • Wallpaper (which I didn't end up using you will see below)
  • Nail gun (I had one already with a compressor)
  • New cabinet hardware if you are changing
  • Painters tape
  • Brown paper to help cover items in my cabinets
  • Brushes (I recommend natural bristles especially for chalk paint and wax)
  • Cotton rags for the wax
  • Circular saw
Step 1:
First step was to begin removing all kitchen cabinets and drawers. I recommend having some bags or boxes handy as you will need somewhere to put your items from the drawers. I left everything in my cabinets. Also, make sure you have a large work-space set up, I suggest in a garage. Also, remove all hinges and cabinet hardware.

Step 2:
Begin taping off everything. I chose not to paint inside my cabinets so I left everything in them and covered with brown craft paper. I taped off all edges around the inside and anywhere the cabinets met the painted walls. Don't forget to tape around built in appliances and sinks as well.

Step 3:
I cleaned off all my cabinets since after all, this is in a kitchen and there's this little thing called grease that likes to build up... I like Mean Green because it doesn't have harsh fumes and really cuts through the grease. I just used and old rag and this to wipe down all doors, drawers, and base cabinets. I even had to use a straight razor for a few areas that were thick. If you are using a paint that requires sanding or stripping, I recommend doing that step next.


Step 4:
So, if you are using the wallpaper this is where you add it. Once I realized I bought LEGIT wallpaper I decided to nix that idea. I thought I had purchased the stick on but this was the kind that you have to run through water and such and no one has time for that. It ended up working in my favor however. 
*Note: Pre-pasted does not mean stick on.*

Step 5:
I then added trim to my cabinet and drawer faces. Thanks to my Mom's meticulous measuring. 🤓 Make sure to measure twice, cut once. Cut the corners at 45° angles to the best looking finish. Although you are painting, you can still see how they are cut. You will then line up your pieces and nail them to your cabinet faces. Make sure you measure the depth for your nails. You don't want too long that you shoot the nail all the way through it or too short that they don't hold your trim to the cabinet. We used 1/4" x 1 3/4" for the doors and 1/4" x 1 1/8" for the drawers. Since the drawers are a smaller face, I used smaller for those as to not completely close in the drawer facing.


Step 6:
Paint time!!! This was my favorite part although long. I used Old White Annie Sloan Chalk Paint
I don''t purchase Annie Sloan brushes (as they are too expensive for me) but make sure you use natural bristle brushes. The idea with chalk paint is to paint in every direction for that old, textured look. This was a difficult  step for my mom as she likes to paint in long even strokes. There is a great video here on Annie Sloan's site to show you the technique I used. I also like to leave it open for a bit before I paint to let it thicken up. This also helps you get that texture. 

I painted about 3 coats on all doors, drawers, and base cabinets. Sometimes you can get away with just 2 coats. 
*Note: Chalk paint dries quickly and even faster in the heat so be aware. This can be a blessing and a curse.*
Before                |              After

Step 7:
Now it's time to wax!! I used just clear wax on this project but you could also add dark wax it that is the look you are going for. If you are using dark wax, I will add tips for that at the end of this step. Make sure you have your natural bristle brush and cotton rags. You can put most of the wax on with rags if you'd like, but you will need the brush for corners and small detail areas. I just put this on in a random pattern as to cover all the paint. You will be able to tell where you adding it as it will have a wet look.

Allow to dry until hard (usually 30 mins). Then, use a new rag (not the one you used to apply) to buff the wax. You will do this by rubbing in a circular motion. Dig down to your inner Mr. Miyagi. "Wax on, wax off." You will need to do this on all painted surfaces. This will create the barrier to protect your paint. I have read tutorials where people have also used polyurethane or other floor finishes. If you chose this route, please read their tips or tutorials on that as I didn't use this.

If you are using a dark wax.
  1. Apply a coat of clear wax first. Use my steps above on that.
  2. Apply your dark wax after the clear has completely dried. If you get it too dark, you can use the clear wax as an eraser.
  3. Apply another coat of clear wax once the dark wax dries and has the look you want.
*Note: If you apply the dark wax first, you will stain the paint and you CANNOT lighten it.*

Step 8:
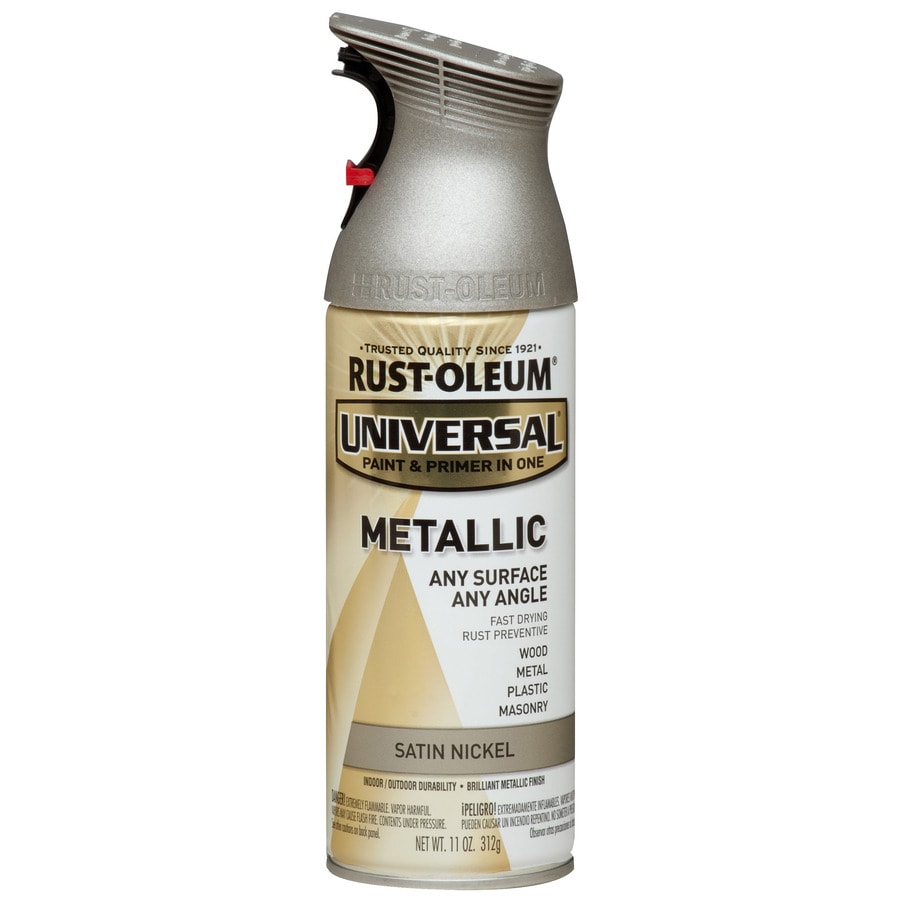
I had 2 doors that had a metal screen in them. These I taped off on the white painted part (once it was dry of course). I used Rust-Oleum's Satin Nickel Metallic Enamel spray paint. There are many other color options but I was using all satin nickel hardware. Also, a pop of color would be fun!!
Rust-Oleum Universal Nickel Metallic Enamel Spray Paint (Actual Net Contents: 11-oz)
I have also used Rub-n-Buff before but it is very tedious on a product like this with all the holes. I sprayed 2 coats on the metal. I needed 2 because the meal had the same stain/finish as the cabinets on the metal which made it very yellow to begin with. Once that dried, I could remove the tape.
Before         |                     After         

Step 9:
Once everything has dried, go through and remove all your painters tape and paper. It looks so different doesn't it?
Nala thinks she's helping.

Step 10:
Add back your original or new hardware. This includes your hinges and cabinet hardware. I wanted pulls on everything so I had to drill 1. new holes anyways through the new trim and 2. a 2nd hole on the doors since they originally had knobs. I used an extra piece of trim to make template so that each door looked the same and used the original hole as  guide. Once I had all those holes drilled I could add all my cabinet hardware. I actually took all this hardware from my Nana's house after she passed away.

Step 11:
Re-hang all your doors and put back all your drawers. Don't forget to put all your stuff back in your drawers!!!

Step 12:
I also went through and painted all the trim and paneling in my kitchen as well. Use the same steps as above for your paint and wax as I already laid out.

Step 13:
Enjoy your finished project!!! I am sure it turned out fabulous. 
Before (Top)          |          After (Bottom) 
Sorry still messy in these pics.

Before (Top)          |          After (Bottom) 
Sorry still messy in these pics.


Post your before and after pictures in the comments below!!!

Sunday, July 2, 2017

DIY : Vintage Fan Desk Lamp


Hey guys! To say that I am excited about this project would be an understatement. My LOVE for DIY, vintage finds, and repurposing made this a complete joy for me! This was a Christmas present for my brother and his girlfriend this past Christmas.

Once I decided what I wanted to do for them, the search began for the perfect fan. I knew it wouldn't be easy but I didn't have to look far. Luckily, there are no shortages of antique and junk stores in my area. I found the perfect fan at one of my favorite places in town the Rink Gallery. I will say, I am typically rather partial to this place. It has the right amounts of antiques and junk (junk being my absolute favorite).

So, as I was about to give up on even finding a fan after going to multiple places with no luck at all, and I was almost all the way through the place, there one was. Just sitting there like it was waiting for me to find it. 

I will admit, it took me a minute to decide on it. I mean, it was $75 and it seemed high for something I was about to completely gut. There I stood, in the middle of the store, they were about to close in 15 minutes and I am searching on Etsy and Google for other fans and their pricing. Once I found that the majority of the fans started around $60 for fans half the size of this one (and my parents telling me to quit over thinking things) I bought it. 
And home we went. 

Once home and ready to work, it was time to take this puppy apart. This I will tell you is an intense process. One suggestion I have, I did this over a couple week time span, (not that it took me that long, I just did little bits here and there), so as you take your fan apart, find a system to keep track of what parts go where. The majority of the guts will become trash. I however, DIDN'T, so it was a lot of fun at the end putting it back together and seeing what fit where. I felt like a toddler learning that the round peg doesn't fit in the square hole.
(I know you are jealous of this awesome tie-dyed blanket I have here. I used it to keep my carpet clean since I was working on in my den and this has basically become a dog blanket 🐶)

Look at that gross old plug I took out.

Once I had it all take apart, I cleaned out a lot of the old grease. Not that this was needed for function, I just thought it gross to leave it all in there. And there was a TON. Then I decided what colors I wanted to paint it. I wanted to keep the vibe of it but have it look newer/more modern. You can also leave it in its original state I just new that wouldn't fit in my brother's aesthetics (mine it would). So I decided on a chalkboard and satin nickel spray paint both from Rustoleum.
I made sure to take the manufacturer logo off the grill and tape off the original labels on the fan body to still keep the integrity of the fan. I then painted all the pieces.
(Before I painted. 
I didn't actually need to paint the bottom since I recovered that in felt but oh well)

The painting process was interesting considering my brother was now home at this point and insisted on going out in my garage so I had to keep covering with a dog crate lid and a sheet. I recommend if this is a gift, do it when they aren't staying at your house or make sure they don't enter into your space. I had to do a few touch-ups because of this but no biggie.

Now, it was wiring everything up.
Things I used on mine:
  • Brass keyless sockets from Lowe's 
  • 18/2 clear lamp cord  from Lowe's (about 5')
  • 8-pk brass lamp pipes from Lowe's 1/8 (I only used the small ones so I bought 2 pks)
  • Rotary switch from Lowe's
  • 4-lite cluster body from Liberty Brass (make sure you watch the pipe sizing, I used 1/8 which is pretty standard). 
  • Vintage bulbs I bought from my store Lifestyle's Stores
  • Black and white zig-zag round wire from Vintage Wire Supply (I ordered 5' but they are completely awesome and sent me an extra foot)
  • Antique replica black plug from Vintage Wire Supply
  • Long 1/8 all thread approximately 8" 
  • Wire strippers
  • Electrical tape
  • Wire nuts
  • Screwdriver
  • Razor blade
**WARNING-IF YOU ARE NOT COMFORTABLE WITH WIRING GET SOMEONE WHO IS. I AM NOT AN ELECTRICIAN AN AM NOT RESPONSIBLE IF ANY WIRING IS DONE WRONG*

I began by wiring the sockets one-by-one. Make sure, if you are not familiar with wiring you look up the correct way. I typically use this image. It helps you find the correct wires and screws. (This is also helpful when you get to the plug.) There are also a lot of great videos on YouTube you can watch.
Once I had all the sockets wired, we had to attach them to the cluster body. This was tough since it gets very tight with all the wiring. I actually had to redo it since the first time I did the wires shorted. I knew this because when we plugged it in it POPPED and smoke came out the back. DO NOT touch the lamp when you are testing and plugging it in for this reason. If I had been touching the lamp when I plugged it in I could've been seriously injured.

Once we had all the wiring good and safely wrapped in electrical tape I attached cluster body and sockets to the body of the motor with the long all thread. This is a trial by error process finding the correct length and positioning. You don't want it too far into the cluster body that it pinches or cuts into the wires. I painted the all thread since you would see it through the body and I didn't want it to be noticeable.

Once that was in place, I wired the sockets onto the decorative round wire. I only used this where it would be seen (along the side of the body and for the actual plug). Once again, make sure you use your wire nuts and electrical tape properly and make sure that the wires are not touching one another (hot and neutral). 

I then added the plug to the end. This was also fun since it was my first time using a separate plug I had to wire on. The plug I used also had the same size prongs so there wasn't a "hot and neutral" side which took me lots of searching online.

I also added a rotary switch which I enlisted the help of my Uncle to wire that since he is an electrician and I kept blowing the breaker so I insist on enlisting help here or finding a good how-to online.

When all the wiring was said and done, all I had left to do was reassemble it. I recovered the base with all new felt which I already had but you can find this at any craft store. This took two people to do FYI. 

And voila...all done!!!


WHAT'S BEEN UP...

So I realize I have taken a bit of a hiatus from this blog...

I'd like to get back on here and sorry I haven' been. There has been so much going on that it's just been a whirlwind!!Work is getting crazy, Relay season has finished, starting a new venture with It Works, my brother is getting married and buying a house; there's almost so much I am not sure where to start again.

So I am just going to leave this little bit here and I will pick up...

Sunday, March 13, 2016

Getting Excited

I am getting so excited for this coming year's Relay For Life of Oklahoma City event!!!

Here is a video I made for last year's event. This is why I love this organization so much.

Check it out. Want more information on why I Relay? Visit my personal fundraising page!!!
Relay for Life
#OKCRFL2016

Saturday, August 16, 2014

Piano face lift : Part I

My Grandmother left my cousin Rachel her old piano after she passed. This piece has definitely seen a lot in its days. Children growing up right around it; then grandchildren. It has scars, stories, and a life of its own that it has lived. I was enlisted in giving this piece a face lift since it has seen its better days as far as the looks department goes. I was chosen since as they say, I'm the "crafty" one in the family and seem to get the most joy out of these sorts of projects.
So, I have decided to share my process and journey with you as I go along. This will be a project that will last me awhile indeed. Hopefully I can truly bring a new life to this for my cousin.
To begin, you will need to gather your supplies. I purchased all of these at Lowes or you can use your local hardware store you like best.
  • Stripper.
    • I like Citristrip since it's not as harsh and low VOCs which means less fumes.
  • Mineral Spirits.
  • Chemical resistant gloves.
  • Flat scraper.
  • Stripping pads.
  • Drop Cloth if you don't want a mess all over your floor.
    • Trust me, there will be a huge mess.
  • Eye wear.
    • You could possibly splash or fling the products or the stain/paint your stripping into your eye.
  • Natural bristle brush.
  • Metal pan to pour your stripper into, or whatever your instructions tell you to use.
  • Mask if using a stripping agent with high VOCs.

Tuesday, September 10, 2013

DIY Milk Can Lid Pendant


As you probably saw on my earlier post for my DIY Mason Jar Chandelier, I needed a light that had the same feel for over my kitchen sink. You could also do this with a mason jar, metal colander, even a wire basket; the possibilities are endless!!
What you'll need:
Item for your pendant shade, I used the metal lid from an old milk can.
Like I said, you could use a mason jar, colander, anything you can cut/drill a hole into.
Pendant Kit
I got mine at Lowe's for about $20.
You could also wire this from scratch using 18-2 lamping wire (or a lamp kit which can be found at any hardware store), a keyless socket (get which size you want for the type of bulb you want to use & make sure it is an exposed socket where you can see the threading around it, not smooth), wire nuts, canopy, & mounting bracket. You can follow my steps on the wiring in my Mason Jar Chandelier how-to.
Socket ring (if you didn't get a kit. This is what will hold your item.)
Drill
Tin Snips
Marker
Light bulb!
I used a vintage bulb that I got at Home Depot for about $9.

Flag cake

So, I hope that everyone had a great 4th of July weekend. I know I did, minus the work...
I had been dying to make this cake for the 4th and finally had a chance to for a BBQ. It is fairly simple, but does require a bit of patience. I got the original recipe here.
So here are your yummy ingredients:
Red Cake Layers
1 box Betty Crocker® SuperMoist® white cake mix
1 pint (2 cups) strawberries, stems removed, (I used frozen for mine) pureed in blender or food processor to about 1 1/4 cups
1/3 cup vegetable oil
3 egg whites
1 Tsp red paste food color (you must use a paste not liquid or it will be pastel)
Blue Cake Layer
1/2 box Betty Crocker® SuperMoist® white cake mix (about 1 2/3 cups dry mix)
1/2 cup blueberries, (I used frozen for mine) pureed in blender or food  processor
3 Tbsp vegetable oil
2 whole eggs
1/2 Tsp blue paste food color (you must use a paste not liquid or it will be pastel)
3 Tbsp Betty Crocker® white star-shaped candy sprinkles or nonpareils
White Cake Layer
1/2 box Betty Crocker® SuperMoist® white cake mix (about 1 2/3 cups dry mix)
1/2 cup water
2 Tbsp vegetable oil
2 egg whites
Frosting and Sprinkles
3 containers Betty Crocker® Whipped fluffy white frosting
2 containers of Cool Whip (this I added from the original recipe)
Betty Crocker® red, white and blue sprinkles, as desired

Sunday, September 8, 2013

DIY Mason Jar Chandelier

So, after I had purchased my new house I went to work on replacing all the light fixtures in the house. I couldn't live around that horrid polished brass, you all know what I'm talking about. When it came down to the kitchen though, I decided I want something quirky and different from your typical breakfast light. You see, I work in a lighting store so I stare at those fixtures all day everyday.
When I finally decided I wanted a mason jar chandelier, I went on the hunt to find some inspiration. I didn't want to buy one for $400 when I know that I was fully capable to make one on my own. I came across a DIY that gave you step by step instructions at Kara Paslay Design. This is truly the best one I found. Now I made a few changes to my design which I'll tell you below, but feel free to use her site as well.
Disclaimer:
Before we start, I am not an electrician and don't assume responsibility if your house burns down using my instructions. If you are not comfortable, HIRE AN ELECTRICIAN!!


What you'll need: 

Thursday, March 7, 2013

Lets Raise a Little Awareness Today

So, this year will be my second year in doing the Relay for Life OKC. It is such an amazing thing to be a part of and also a lot of fun, with a lot of walking. I know, you're thinking that's way too tiring for me to do...walking ALL NIGHT LONG! You would truly be amazed, when you know you are doing something for such an amazing cause! Yes, by the end your feet hurt and you are worn out from being up all night long, but you are making such a difference. I actually believe its tougher then running a 5K because by then end of the night you have walked much further and for a lot longer.

There is such an amazing sense of community and friendship and fighting for something so amazing, more birthdays and no more cancer. CANCER SUCKS!!

Everyone on my team and at the relay has their own reasons for walking. It me be for a friend, family member, or even themselves. I walk for my Papa & Uncle who are both still fighting and my Grandmother who is no longer with us but beat her cancer TWICE! They are all truly amazing people.

So I challenge you readers out there to get up and take a stand. Make a donation to our team or join our team or another Relay in your area! Everyone is touched by cancer in some way unfortunately, so do this to help the fight!

Tuesday, February 12, 2013

Why I Relay


I am participating in the American Cancer Society's Relay For Life
because I want to make a meaningful difference in the fight against
cancer.

Cancer has been a plague on both sides of my family for as long as
most of us can remember. All different kinds to so many amazing
people.

Currently my Papa is battling lung cancer. He has done 2 rounds of
radiation, chemo and a pill therapy and can do nothing more since he is also battling COPD. The lung cancer is a result of Agent Orange and I'm sure working in
maintenance in the public school in Lawton OK in the 70's. He is such an amazing man and so strong. He strives to keep going even though we lost our Nana (his wife) a year ago so suddenly. So many times, I can't believe he hasn't just given up so he can be with her. I can only guess that he knows we need him too.

Tuesday, October 2, 2012

This is Bat Country

So anyone at all who knows me knows that I absolutely love Halloween.
I am like the creepy Halloween lady in my neighborhood...I could run a haunted house in my own home during this time of year.

Anyways, I found this picture on Pinterest awhile back and have been craving for October to come along so that I can recreate this at my own house.

My inspiration.

Corkboard Facelift

I decided to give an old corkboard I had laying around a little makeover.

I had all the items I needed laying around but if you have to go out and buy this project will probably cost you $30-$40 depending on the board and stencil you buy.
This started as a simple corkboard you can buy at Walmart or Target (or just about anywhere).
I think this one was a RoseArt. See....pretty plain jane.

Now, you will need to pick a design. Just go buy a stencil for whatever design you want.

Fun Take on a Picture Frame

I actually did these frames as a birthday present for a friend. You could get creative on what you use for the frame...a block of wood, old cabinet door, etc. I actually have a lot of old wood samples from a furniture company from my work that I used.

What you'll need:
Whatever you are going to use for the main part of the frame
(Cabinet door, block of wood, be creative)
Picture
Accessories to add on
(Metal pieces, appliques, etc.)
Glue

So on these wood samples, one had a lot of texture and the other a lot of wax which makes it kind of hard to glue anything on. I had to use a paint stripper to remove the finish from the raised panel in the center.
(If you are going to do this step have a clean surface that nothing can possibly be ruined if it drips our spills.)
Wear thick rubber gloves, if the stripper gets on your skin it will burn extremely bad. Pour the stripper into something you don't care about: an old bowl our cup. I  used an old coffee pot I bought at the thrift store for a dollar for this very purpose. Use a paint brush and brush on the stripper. Let sit for about 30 mins. Use a paint scraper to scrape off the paint or finish. It may take a few applications to remove everything. Feel free to leave some for a rustic, antique look. When done clean with a damp cloth and let dry completely. I would use an old rag just in case it ruins it.
(Sorry I didn't get a picture of this)

Tuesday, September 4, 2012

DIY T-Shirt Scarves

So...if you are anything like me, you are always looking for new and cute scarves.
Well, if you really are anything like me, you hate paying for them. I am on a bit of a stricter budget,
so any money I can save is great.

I have several bags of old clothes that I keep meaning
to donate but as of right now,
they are dust collectors in my closet.
So, I went rummaging through them to find ones that I liked the fabrics of.

You are going to need:
Old T-Shirt
(The wider it is the longer your strands will be...The longer it is the more strands you will have)
Scissors

First thing you will need to do is lay your shirt out flat.

Friday, August 31, 2012

Missing That Which I Have Lost

Today I find myself having a rough day. It started out fine...getting stuff for my new desk at work and a few things for a craft project I am doing. As I am working on this, I find myself thinking very strongly about my Nana and my Grandmother who both passed early on this year. I never thought I would lose them both so quickly. I wasn't fully prepared even though I was at peace.

You never can truly prepare yourself for such a thing. Although I knew they were going to a happier place and would see friends and family that they too had lost, I still find it so difficult to cope with. Knowing they will never be around again for me to get advice from, or just a card even. Knowing that I will never see their smiles when everyone is gathered together for the Holidays.

I can't help but sit here, sobbing like there is no tomorrow. Sometimes I feel there isn't. How can there be when they are no longer here? How do you go on? I just want them back...I want to hug them, and kiss them, and tell them that I love them. I stare at their pictures and remember every single happy moment with them and every talk we ever had. I know I wouldn't change a second of any moment that I ever shared with them.

I strive to be a better person, someone they would want me to be and can be proud of. Its extremely hard though, knowing I can't pick up the phone whenever I want to just hear their voice one last time. To hear them say they love me again.

So, today is a tough day for me...

I just can't help but miss them with every single inch of my heart.


To live in hearts we leave behind
Is not to die.
~Thomas Campbell, "Hallowed Ground"

Sunday, August 26, 2012

Hand Painted Shoes

So I had seen an adorable pair of hand painted Toms on Pinterest. Of course I had to make these but I didn't care to pay $50/pair just to draw all over them. I found these on The Breast Cancer Site for $20/pair. Each pair I bought had a pair donated through Soles4Souls and I helped fund mammograms for women with Breast Cancer. So it was truly a win win.

What you'll need:

A pair of canvas shoes
(I got just plain white so they were easy to color on top of)

Fabric markers...I used the Tulip brand found at Walmart
(You can use fabric paint as well but that'll be much more tedious and time consuming. The fabric markers are permant, washable and easy to use.)

Imagination!!!

Thursday, August 2, 2012

DIY Shrug

This is a fun way to revamp an old shirt that was destined for the trash or Goodwill and recreate it into something new and fun. The purple shirt was a gift from a friend that never quite fit right. I loved the color and the beading and really didn't want to give it away so this was a perfect solution. My other shirt was an inexpensive shirt from Walmart that always looked a little frumpy on.

I originally found this on Wobiso's blog.

What you are going to need is:
An old shirt  (Make sure that it fits you before you start. If it is pretty small, it will be too small when you are done.)
Scissors
Ribbon  (Or whatever you want to use for the tie. You can even use the bottom of another shirt.)
Sewing Machine
Sewing Pins
Safety Pin  (This will be used to pull the ribbon through.)

Sunday, April 22, 2012

Another Amazing Woman Gone

So recently I wrote a blog about my amazing Nana's passing. It's been a little over 3 months. Well, early Thursday morning we lost another amzing persn in our lives.

My Grandmother. Wanda Jean Fietz.

She left us at about 5 AM that morning. This was so sudden for us. She had been taken to the hospitalbfor nausea and weakness and turns out she had had a heart attack. No one knew. She had had no pain at all. But this just shows you how strong of a woman she was. She even knew that she woukd be leaving us and going to join the Lord. She had a Guardian Angel she had told us about on many occassions. I believe she had told her she would be leaving us and making sure she got to see as much of her family as she could and saying goodbye to her friend.

She was amazing in that aspect. I always loved her stories of incidences of her Angel or other stories of her life. Even though I'd heard them many times, I nevermind hearing them. My favorite was of when she was younger, she hadbeen in downtown OKC to do some kind of testing for the IRS and hr and a frind had gone to eat in an undergroun mall there when apipe had bursted. They had to run to escae the flooding water, when the escelators flattened out for emergency reasons ti avoid shock from the water. She told me of a man that helped to lift her and her friend up iut of the area. I loved that story, even though I'd heard it many times. I still have not visited this underground mall. We always talked of going together. I still plan to find it and witness the setting of one oof my favorite stories.

Monday, April 16, 2012

One of the greatest women in my life

About three months ago, I lost yet another wonderful person in my life. But this time, it was the closest person I have ever lost in my life.

My Nana.

LaVonne Lake

She was an amazing person. She was strong and independent and everything I strive to be. She raised 4 children almost alone while my Papa was in the Army. They moved to Lawton, OK finally from Rockford, IL.

We were so close since she used to babysit my brother and I all the time when we were younger and lived closer. She wasn't that typical grandmother, that I didn't really know and just shied away from. Although, she lived 4 hours away from me pretty much all my life, I was extremely close to her. I could talk to her about anything. She always made an attempt to come see my dance recitals when she could, which meant the world to me since dance was a huge part of my life growing up. She was always sure to send me cards for every occasion, newspaper clippings of articles she thought I'd like, recipes, religious books, health tips she'd cut out from magazines and much much more. Even though I'd only see her a few times each year, its like we'd never skipped a beat.